

Silver Cross Cot Bed Instructions: A Comprehensive Guide
Welcome! This guide details assembly, conversion, and safe use of your Silver Cross cot bed. It covers base height adjustments, dropside operation, and transitioning to toddler configurations.
Understanding Your Silver Cross Cot Bed
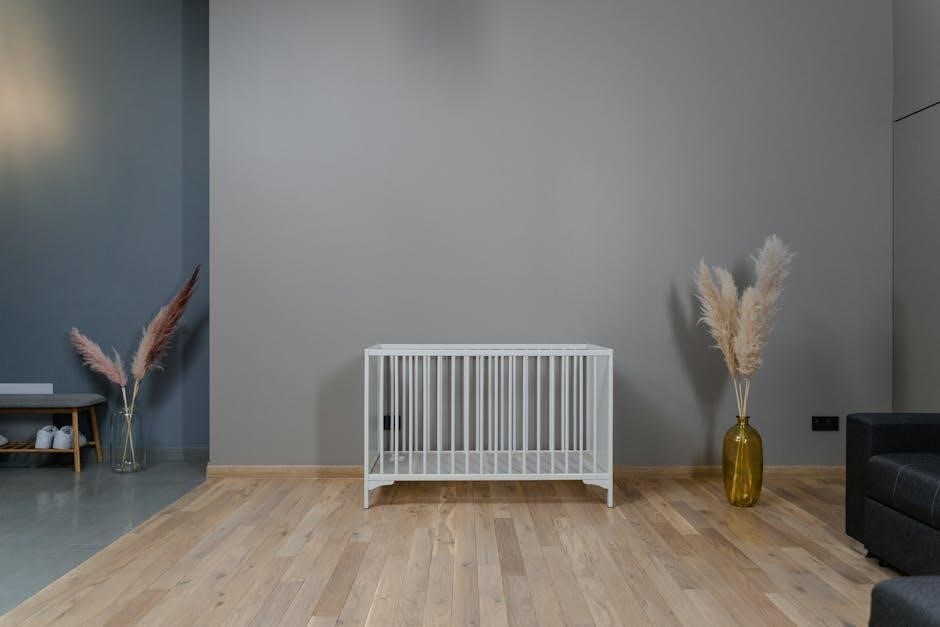
Your Silver Cross cot bed is designed for versatility, adapting from a secure cot for newborns to a comfortable cot bed as your child grows. Understanding its features ensures safe and prolonged use. The cot base offers three height positions, with the lowest being the safest for initial use, minimizing the risk of your baby climbing or falling.
As your child develops, you can lower the base incrementally. The cot bed also converts into a convenient day bed mode, removing the need for cot sides, and further transitions into a toddler bed by removing panels. The dropside mechanism is a key feature, allowing easy access to your baby, but requires careful operation and adherence to safety guidelines – always ensure it’s securely locked in the highest position when unattended.
Familiarize yourself with all components and the assembly process detailed in this guide. Proper assembly and understanding of these features are crucial for your child’s safety and your peace of mind. Refer to the provided fittings list to ensure all parts are present before beginning.
Parts List and Identification
Before commencing assembly, carefully unpack all components and verify against the following list. This ensures you have everything needed for a smooth and safe build. Key fittings include 6 x L, 1 x 4 Z, 2 x B14, 4 x C12 (8 x 35), 4 x E1, 4 x C17 (6 x 40), 6 x J6, 8 x E2 (M6 x 50), and 4 x E97.
Additional hardware may include (6 x 40) E97 screws and various sizes of (M6 x 50) and (M6 x 60) bolts. Refer to the diagrams in the assembly instructions to correctly identify each part. The cot bed structure itself comprises side panels, end panels, a base, and the dropside mechanism.
It’s vital to distinguish between different screw lengths and types to avoid damaging the wood during assembly. If any parts are missing or damaged, do not proceed; contact Silver Cross customer support immediately. A complete and accurate parts inventory is the first step towards a securely assembled cot bed.
Initial Setup: Base Height Adjustment
The Silver Cross cot bed base offers three height positions, providing flexibility as your child grows. However, prioritizing safety is paramount: the lowest position is always the safest, especially for newborns and younger babies. This minimizes the risk of your child climbing or falling out.

To adjust the base height, locate the support brackets on the inside of the cot bed sides. Carefully remove the screws securing the base at its current level. Then, reposition the base to the desired height, ensuring it sits securely on the chosen brackets. Re-tighten all screws firmly, checking for stability.
Regularly verify the base is securely fastened as your child’s movements can loosen the fixings over time. Remember, a stable base is crucial for a safe sleep environment. Always double-check the height setting before placing your baby in the cot bed. This initial setup is a foundational step for safe usage.

Step-by-Step Assembly: Stage 1
Begin by identifying the two side panels (1a & 1b – refer to the parts list). Lay one side panel flat on a protected surface to prevent scratching. Attach the headboard and footboard to this side panel using the provided fittings – specifically, four (6×40) screws (E97) per connection. Ensure the screw holes align correctly before tightening.
Next, carefully attach the second side panel to the assembled headboard and footboard, again using four (6×40) screws (E97) at each corner. Double-check that all connections are flush and secure. It’s crucial to avoid over-tightening the screws, as this could damage the wood.
At this stage, you should have the basic cot bed frame assembled. Before proceeding, inspect all connections to confirm their stability. This initial frame provides the foundation for subsequent steps, so accuracy is key. Refer to diagrams if needed for correct orientation of the panels.
Step-by-Step Assembly: Stage 2
With the main frame assembled, focus on installing the cot base. The cot base can be fitted at three different heights – remember, the lowest position is the safest option. Select your desired height and align the base supports with the corresponding slots inside the cot bed frame.
Secure the base supports using the appropriate fittings – likely the L x 1 and Z x 1 fittings as indicated in the parts list. Ensure each support is firmly attached on both sides. The base must sit level and securely within the frame to prevent any instability.
Finally, attach the dropside mechanism (if applicable to your model). Carefully follow the instructions specific to the dropside, ensuring all moving parts operate smoothly and are securely locked when in the up position. Always prioritize safety when working with the dropside mechanism.

Cot to Cot Bed Conversion
Transitioning your Silver Cross cot into a cot bed offers extended usability. Begin by removing the dropside, if present, carefully detaching all associated fixings. This creates the open sides characteristic of a cot bed. Ensure all screws and bolts are completely removed and stored safely.
Next, adjust the cot base to its lowest setting – this is crucial for stability as the child grows and becomes more active. Double-check that the base is securely locked into position on all sides. The lowest setting provides a safer sleeping environment for a more mobile toddler.
Finally, inspect all connections and ensure the frame is solid and stable. The cot bed is now ready for use, providing a comfortable and secure sleeping space as your child transitions from cot to bed. Remember to regularly check all fixings for tightness.
Adjusting the Cot Base Height
Your Silver Cross cot bed base offers three adjustable height positions, catering to your child’s developmental stages. The highest position is ideal for newborns, allowing easy access for lifting and placing your baby in the cot. As your child begins to sit and stand, lower the base to the intermediate setting for increased safety.
The lowest position is the safest once your child can pull themselves up to a standing position. This minimizes the risk of accidental falls. To adjust the height, locate the side supports and carefully remove the fixings securing the base. Lift or lower the base to the desired level, ensuring it’s evenly supported on all sides.
Re-secure the fixings tightly, verifying the base is firmly locked in place before each use. Always prioritize the lowest setting for older babies and toddlers. Regularly check the fixings to maintain stability.
Dropside Mechanism: Safety and Operation
The Silver Cross cot bed features a dropside for convenient access to your baby. Crucially, always ensure the dropside is in the highest, locked position when the cot is in use, especially if your child is unattended. This prevents accidental lowering and potential falls.
To lower the dropside, locate the release mechanism – typically a button or lever – and depress it while gently lowering the side. Ensure the dropside moves smoothly and is fully lowered before placing or removing your baby. To raise it, lift until it clicks securely into the locked position. Regularly check the smooth operation of the mechanism.
Never modify or disable the dropside mechanism. Do not allow children to operate the dropside themselves. If you notice any damage or malfunction, discontinue use immediately and contact Silver Cross customer support. A properly functioning dropside is vital for your child’s safety.
Converting to Day Bed Mode
Transitioning your Silver Cross cot bed to day bed mode offers a safe and comfortable sleeping space as your child grows and begins to stand; This conversion involves removing specific panels to create an open-sided bed, allowing easier access for your little one.

Refer to the assembly instructions for detailed guidance on which panels to remove. Typically, this involves detaching both ends of the cot bed, leaving a secure base and side rails. Ensure all removed parts are stored safely away from your child. Double-check the stability of the day bed configuration before use.
When in day bed mode, maintain a safe distance of at least 300mm (approximately 12 inches) between the bed and any walls or obstructions. This prevents entrapment and ensures adequate ventilation. Regularly inspect the day bed for any loose screws or damaged components. Remember to always prioritize safety during and after conversion.
Toddler Bed Configuration: Removing Panels
Converting your Silver Cross cot bed into a toddler bed provides a low-to-the-ground sleeping solution, fostering independence as your child transitions from a cot. This configuration typically involves removing both side panels, transforming the cot bed into an open-sided bed frame.
Carefully detach the side panels following the instructions provided in the assembly manual. Ensure all fixings are safely removed and stored away from your child. The remaining base and head/footboards will form the toddler bed structure. Prioritize stability by verifying all connections are secure before allowing your child to use the bed.
Remember to maintain a safe distance of 300mm between the bed and any walls. This prevents potential entrapment hazards. Regularly inspect the toddler bed for any loose parts or damage. Consider adding a bed guard for added safety, especially during the initial transition period. Always supervise your child as they adjust to their new bed.
Wall Placement and Safety Distances
Proper placement of your Silver Cross cot bed is crucial for ensuring your child’s safety. Maintaining adequate distance from walls and other furniture prevents potential hazards like entrapment or accidental injury. Always adhere to the manufacturer’s recommended safety guidelines regarding positioning.

Specifically, a minimum distance of 300mm (approximately 12 inches) should be maintained between the side of the cot bed and any wall. This space allows for sufficient airflow and reduces the risk of a child becoming wedged between the bed and the wall. Avoid placing the cot bed directly in front of windows or near cords and blinds, which pose strangulation risks.
Regularly check the surrounding area for any objects that could be climbed on to reach the cot bed, creating a fall hazard. Ensure the cot bed is positioned on a level surface, away from direct heat sources like radiators. Prioritize a safe and secure environment for your little one’s sleep.
Fittings List: Detailed Breakdown
Ensuring you have all the necessary components is the first step towards successful assembly of your Silver Cross cot bed. This detailed breakdown lists all fittings included, helping you verify completeness before you begin. Carefully cross-reference this list with the parts you’ve unpacked.
The fittings include: 6 x L (likely longer bolts), 1 x 4 Z (a specific bracket or connector), B14 x 20 (screws – quantity 20), C12 x 4 (another screw type – quantity 4), and (8 x 35) screws. Additionally, you’ll find E1 x 4, C17 x 4 (with 6 x 40 dimensions), J6 x 6, E2 x 8 (M6 x 50), and further (6 x 40) screws. Finally, there are E97 x 4.
It’s vital to keep these fittings organized during assembly to avoid confusion. If any parts are missing, do not proceed and contact Silver Cross customer support immediately. Using incorrect fittings can compromise the structural integrity and safety of the cot bed. Refer to the diagrams in the assembly instructions for visual identification of each fitting.
Troubleshooting Common Assembly Issues
During Silver Cross cot bed assembly, some issues are frequently encountered. If you find screws difficult to tighten, ensure you’re using the correct size and type, referencing the fittings list. Misalignment of panels often stems from not fully loosening previously tightened screws – slightly back them off to allow for adjustment.
If the dropside mechanism feels stiff, double-check that all connecting components are correctly aligned and lubricated. A common problem is incorrectly positioning the cot base; remember the lowest setting is the safest and offers the most stability. Ensure the base is securely locked into the chosen height.
For difficulties converting to cot bed or day bed mode, revisit the relevant steps in the instructions, paying close attention to panel removal and securing points. If parts don’t seem to fit, avoid forcing them; re-examine the diagrams. If problems persist, contact Silver Cross support for assistance – do not modify the cot bed yourself.
Safety Precautions and Guidelines
Prioritize safety! Always ensure the cot bed is assembled correctly, with all screws tightened and components securely in place. Regularly inspect for loose parts or damage. Maintain a minimum of 300mm between the cot bed and any walls or obstructions to prevent entrapment.
When using the dropside, always ensure it’s fully raised and locked when a child is present. Never leave a child unattended with the dropside lowered. The lowest cot base position is the safest, offering maximum stability and reducing the risk of falls.
Avoid placing the cot bed near windows, heaters, or anything with cords that could pose a hazard. Use only a firm, flat mattress designed for cot beds, and avoid adding soft bedding, pillows, or bumpers, which can increase the risk of suffocation. Adhere to the manufacturer’s weight limit for each configuration. Regularly review these guidelines.
Maintenance and Care Instructions
Regular upkeep ensures longevity! Clean the Silver Cross cot bed with a damp cloth and mild detergent. Avoid abrasive cleaners or solvents, as these can damage the finish. Periodically check all screws and bolts, tightening them as needed to maintain stability. Inspect the dropside mechanism regularly for smooth operation and secure locking.
When converting between modes (cot, cot bed, day bed, toddler bed), double-check that all panels and components are correctly positioned and fastened. Store any unused parts safely out of reach of children. Avoid exposing the cot bed to excessive moisture or direct sunlight for prolonged periods.
For wooden finishes, consider applying a suitable furniture polish to maintain luster. If any parts become damaged, contact Silver Cross customer support for replacements. Consistent care will preserve the beauty and safety of your cot bed for years to come.

Contact Information and Support
Need assistance? For any questions regarding your Silver Cross cot bed, or to report missing parts, please reach out to our dedicated support team. You can contact us via phone at 0845 872 6900. Alternatively, visit our comprehensive website at www.silvercross.co.uk for FAQs, downloadable manuals, and helpful video tutorials.
Our official address is Silver Cross (UK) Ltd, Micklethorn, Broughton, Skipton, North Yorkshire, BD23 3JA. We are committed to providing excellent customer service and ensuring your satisfaction with our products. Please have your model number and purchase date available when contacting us to expedite the process.
For international support or distributor information, please consult the Silver Cross website. We also offer a range of online resources, including troubleshooting guides and safety information. Don’t hesitate to connect with us – we’re here to help!
Understanding Automatic Sign-In Settings

Please note: This section refers to automatic sign-in settings related to the Configure the mode of automatically signing in and locking last interactive user after a restart or cold boot policy, and is included due to its presence in the source material. It does not directly pertain to the assembly or use of the Silver Cross cot bed itself.
This policy controls how users are automatically signed into a system after a restart or cold boot. Understanding these settings is crucial for system administrators managing multiple user accounts. Options typically include automatically signing in the last interactive user, requiring a username and password each time, or disabling automatic sign-in altogether.
Incorrect configuration can pose security risks, so careful consideration is needed. For detailed instructions on configuring these settings within your operating system, please refer to your system’s documentation; This information is provided as it appeared in the source data, despite its tangential relevance to the cot bed instructions.