
Arturia Keystep Manual: A Comprehensive Guide (Updated 05/05/2026)
This manual breaks down using your new Arturia Keystep 37, offering step-by-step guidance for effortless operation and a smooth, intuitive experience.

Welcome to the world of the Arturia Keystep! This compact, yet incredibly powerful, MIDI controller and sequencer has quickly become a staple in studios and on stages worldwide. Designed for musicians of all levels, from beginners exploring music creation to seasoned professionals seeking a portable and versatile tool, the Keystep offers a unique blend of intuitive control and deep functionality.
This manual serves as your comprehensive guide to unlocking the full potential of your Keystep. We’ll walk you through everything from initial setup and basic operation to advanced sequencing techniques and integration with your favorite software and hardware. Whether you’re looking to lay down melodic basslines, craft intricate arpeggios, or control your virtual instruments with expressive precision, the Keystep is equipped to handle it all.
Prepare to dive into a streamlined workflow and discover a new level of creative freedom. Let’s begin your journey with the Arturia Keystep!
What is the Arturia Keystep?
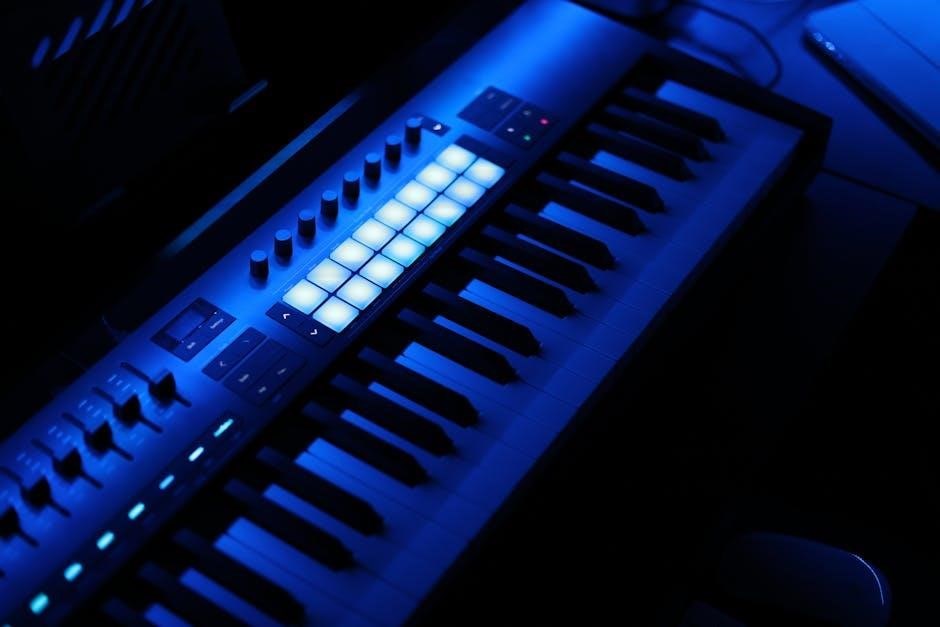
The Arturia Keystep is a versatile 37-key MIDI controller designed to be the central hub of your music production setup. It’s more than just a keyboard; it’s a powerful sequencer, arpeggiator, and chord machine all rolled into one compact and portable package. This device allows musicians to control both hardware synthesizers and software instruments (DAWs) with ease and precision.
Featuring a slim-key keyboard, the Keystep prioritizes playability and portability. Its standout features include a dedicated arpeggiator with eight patterns, a 64-step sequencer for creating complex musical ideas, and a unique chord mode that instantly generates harmonies. It connects via USB and MIDI DIN, offering broad compatibility.
Essentially, the Keystep empowers musicians to translate their musical ideas into reality, whether composing on the go or performing live on stage. It’s a tool built for inspiration and creative exploration.
Keystep 37 vs. Keystep Pro: Key Differences
The Arturia Keystep family offers two main models: the Keystep 37 and the Keystep Pro. The Keystep 37, as the name suggests, features 37 slim keys, making it highly portable and ideal for mobile musicians. It excels as a compact controller and sequencer, focusing on core functionality.
The Keystep Pro, however, is a more expansive instrument. It boasts a full-sized keyboard with 61 velocity-sensitive keys, providing a more traditional playing experience. Crucially, the Pro includes four independent sequencer tracks, significantly expanding its sequencing capabilities compared to the 37’s single track.
Additional differences include dedicated CV/Gate outputs on the Pro for controlling analog synthesizers, and more extensive connectivity options. The Pro is geared towards advanced users needing deeper control and sequencing power, while the 37 remains a fantastic entry point.

Getting Started with Your Keystep
This section guides you through the initial setup process, ensuring a quick and easy start with your new Keystep controller and sequencer.
Unboxing and Initial Setup
Carefully unpack your Arturia Keystep, ensuring all components are present. You should find the Keystep unit itself, a USB cable for power and data transfer, and potentially a quickstart guide. Inspect the Keystep for any physical damage that may have occurred during shipping. Before connecting anything, familiarize yourself with the layout of the controls – the keyboard, arpeggiator section, sequencer buttons, and various connectivity options.
Take a moment to identify the power input, USB port, and MIDI input/output jacks. The quickstart guide, if included, will provide a visual overview. It’s recommended to keep the original packaging for potential future transport or warranty claims. Now you’re ready to proceed with connecting the Keystep to a power source and your computer or other MIDI devices, following the instructions in the subsequent sections.
Connecting to Power
The Arturia Keystep offers flexible power options. You can power it via the included USB cable connected to a computer’s USB port, or utilize a dedicated USB power adapter (5V, 500mA recommended – not included). Connecting to a computer provides both power and MIDI data communication. If using a USB power adapter, ensure it meets the specified voltage and amperage requirements to avoid potential damage or instability.
The Keystep does not operate on battery power. Once connected, the unit should power on automatically. A small LED indicator will illuminate, confirming power is being received. If using a USB hub, ensure the hub is powered to provide sufficient current. Avoid using unpowered USB hubs, as they may not deliver enough power for reliable operation. Proper power connection is crucial for stable performance and preventing unexpected interruptions during your creative workflow.
Connecting via USB
Connecting your Arturia Keystep to a computer via USB establishes both power and MIDI communication. Use the provided USB cable, plugging one end into the Keystep’s USB port and the other into an available USB port on your computer. Your computer should automatically recognize the Keystep as a MIDI device, though you may need to select it as an input/output device within your Digital Audio Workstation (DAW) settings.
No additional drivers are typically required for standard MIDI functionality on modern operating systems (Windows, macOS). However, for accessing advanced features or utilizing the Keystep with Arturia’s MIDI Control Center software, you might need to download and install the latest software version from Arturia’s website. Ensure a stable USB connection for uninterrupted performance and reliable data transfer during sequencing and control.
Connecting via MIDI DIN
For connecting to hardware synthesizers or older MIDI devices, utilize the Keystep’s 5-pin MIDI DIN output. A standard MIDI cable is required – connect one end to the Keystep’s MIDI OUT port and the other to the MIDI IN port of your external device. Ensure both devices are powered on before establishing the connection. The Keystep can send and receive MIDI data via DIN, allowing for control of external sounds and synchronization with other MIDI gear.
Remember that MIDI DIN connections don’t provide power, so your connected devices must have their own power source. You may need to configure your synthesizer to respond to the Keystep’s MIDI channel within its own settings. Experiment with different MIDI channels to avoid conflicts if connecting multiple MIDI devices.
Understanding the Keystep’s Controls
Explore the intuitive layout, mastering the keyboard, arpeggiator, sequencer, chord, and scale modes for unlocking the Keystep’s full creative potential and musical expression.
The Keyboard and Velocity Sensitivity
The Keystep features a slim, 37-note keyboard designed for expressive performance and portability. Each key is velocity-sensitive, meaning the force with which you press a key influences the volume or timbre of the sound produced by your connected synthesizer or software instrument. This dynamic control allows for nuanced and emotive playing.
To adjust velocity sensitivity, utilize the dedicated ‘Velocity’ button. Pressing this button cycles through four different sensitivity curves: Soft, Medium, Hard, and Off. ‘Soft’ requires a lighter touch to reach maximum velocity, while ‘Hard’ demands a firmer press. ‘Medium’ provides a balanced response, and ‘Off’ disables velocity sensitivity altogether, outputting a consistent velocity value for all notes.
Experiment with these settings to find the curve that best suits your playing style and the characteristics of your sound sources. Remember that some synthesizers and software instruments respond differently to velocity data, so fine-tuning is often necessary to achieve optimal results. The keyboard also supports aftertouch, adding another layer of expressive control.
The Arpeggiator Section
The Keystep’s arpeggiator is a powerful tool for creating rhythmic patterns and evolving textures. It automatically plays the notes of a held chord in a sequence, offering a wide range of customization options. The ‘Arp’ button activates and deactivates the arpeggiator. Once engaged, the arpeggiator will cycle through the notes you are holding on the keyboard.
Several parameters control the arpeggio’s behavior. The ‘Octave’ buttons shift the arpeggio’s range up or down. The ‘Gate’ knob adjusts the duration of each arpeggiated note. The ‘Pattern’ button cycles through eight different arpeggio patterns, from simple up/down sequences to more complex rhythmic variations. The ‘Clock Source’ switch selects between internal or external synchronization.
Experimenting with these settings unlocks a vast palette of sonic possibilities. Sync the arpeggiator to your DAW or other MIDI devices for seamless integration into your music production workflow. The arpeggiator’s flexibility makes it ideal for creating basslines, melodies, and atmospheric soundscapes.
The Sequencer Section
The Keystep’s integrated sequencer allows you to record and playback musical phrases, offering a hands-on approach to composition. Pressing the ‘Rec’ button initiates recording mode; the Keystep captures your keyboard input as a sequence of notes. The sequence is stored in one of the Keystep’s eight memory slots.
The ‘Play/Stop’ button controls playback. The ‘Step’ buttons allow for real-time editing of individual steps within the sequence. The ‘Tempo’ knob adjusts the playback speed. You can also adjust the sequence length using the dedicated buttons. The sequencer supports up to 64 steps, providing ample space for complex patterns.
The sequencer’s versatility extends to controlling external synthesizers and software instruments. By sending MIDI data, the Keystep can trigger notes, control parameters, and bring your musical ideas to life. Explore different sequence lengths, rhythmic variations, and note combinations to unlock the full potential of this powerful feature.
The Chord Mode
The Keystep’s Chord mode simplifies complex harmonic progressions, allowing you to play full chords with a single key press. Activate Chord mode by pressing the dedicated button. Then, select a chord type – Major, Minor, Augmented, Diminished, and more – using the rotary encoder. The selected chord type will be triggered whenever you press a key.
You can customize the chord’s voicing and inversion using the ‘Octave’ and ‘Transpose’ buttons, shaping the sound to your preference. The ‘Latch’ function sustains the chord, enabling hands-free playing. Chord mode is incredibly useful for sketching out song ideas, creating lush pads, or adding harmonic depth to your tracks.
Experiment with different chord types and voicings to discover unique sonic textures. The Keystep’s Chord mode empowers you to explore harmonic possibilities with ease, even if you’re not a seasoned keyboard player. It’s a fantastic tool for both beginners and experienced musicians alike.
The Scale Mode
Keystep’s Scale Mode constrains your playing to a selected musical scale, ensuring harmonious melodies and preventing accidental dissonances. Activate Scale mode by pressing the dedicated button. Use the rotary encoder to choose from a wide variety of scales – Major, Minor, Pentatonic, Chromatic, and many more specialized scales.
Once a scale is selected, only the notes within that scale will be playable on the keyboard. This is incredibly helpful for improvisation, songwriting, and learning music theory. You can also adjust the root note of the scale using the ‘Octave’ and ‘Transpose’ buttons, tailoring it to your song’s key.
Scale mode is a powerful tool for musicians of all levels, fostering creativity and musical understanding. It’s perfect for exploring new melodic ideas, practicing scales, or simply ensuring that your playing stays within a desired harmonic context. Experiment with different scales to unlock new musical possibilities.

Advanced Features and Functions
Unlock Keystep’s full potential with detailed explorations of MIDI control, sequencer programming, creative chord usage, and diverse scale mode options for musicians.
Using the Keystep as a MIDI Controller
The Arturia Keystep excels as a versatile MIDI controller, seamlessly integrating with your Digital Audio Workstation (DAW) and external synthesizers. Its responsive keys transmit velocity and aftertouch data, allowing for expressive performances and dynamic control over virtual instruments.
Beyond basic note input, the Keystep’s knobs and buttons can be mapped to control various parameters within your software or hardware. This includes filter cutoffs, resonance, volume levels, pan positions, and more, providing tactile control over your sound.
Utilize the Keystep’s dedicated MIDI output to connect to external synthesizers, triggering sounds and manipulating their parameters in real-time. The USB connectivity enables direct communication with your computer, eliminating the need for a dedicated MIDI interface in many setups. Experiment with different MIDI channels to control multiple devices simultaneously, expanding your sonic palette and creative possibilities. The Keystep truly becomes a central hub for your music production workflow.
Programming the Sequencer
The Keystep’s integrated sequencer is a powerful tool for crafting intricate musical patterns and loops. Begin by selecting a desired sequence length, ranging from 8 to 64 steps. Input notes by pressing keys while in sequence recording mode; the Keystep captures both pitch and velocity information for each step.
Utilize the data entry knobs to fine-tune parameters like note length, velocity, and tie. Experiment with different rhythmic patterns by adjusting step values and incorporating rests. The sequencer supports polyphonic sequences, allowing you to record multiple notes per step for complex harmonies.
Leverage the arpeggiator to generate sequences automatically based on held chords. Explore various arpeggio patterns and adjust the rate and octave settings to create dynamic and evolving textures. Don’t forget to utilize the transpose function for shifting sequences across different keys, unlocking further creative potential within your compositions.
Creating and Saving Sequences
Once you’ve programmed a sequence, preserving your work is crucial. The Keystep offers eight internal memory slots for storing sequences. To save, enter the save mode via the dedicated button, then select an empty slot or overwrite an existing one. Naming conventions are simple – slots are numbered sequentially.
Remember that overwriting a sequence is permanent, so exercise caution! Regularly backing up your sequences is recommended, especially when working on complex arrangements. The Keystep allows for sequence transfer via USB when connected to a computer running Arturia’s MIDI Control Center software.
This software enables you to back up all sequences to your computer for safekeeping and future recall. You can also load sequences from your computer back into the Keystep. Experiment with creating variations of existing sequences by duplicating them and making subtle adjustments, fostering a dynamic workflow.
Using the Chord Mode Creatively
The Keystep’s Chord mode transcends simple accompaniment; it’s a powerful tool for harmonic exploration. Beyond major, minor, and dominant chords, experiment with the various chord types available – diminished, augmented, and suspended chords unlock unique sonic textures. Utilize the ‘Type’ button to cycle through these options.
Don’t limit yourself to root position chords. The ‘Inversion’ function allows you to shift the bass note, creating smoother transitions and more interesting voicings. Combine Chord mode with the Arpeggiator for evolving harmonic patterns. Record these patterns into your DAW for further manipulation.
Consider using Chord mode to generate melodic ideas. Play single notes over the chord progression, letting the Keystep fill in the harmonic context. This can spark unexpected musical directions and overcome creative blocks. Explore different scales alongside chord mode for even richer results.
Exploring the Scale Mode Options
The Keystep’s Scale mode isn’t just about staying ‘in key’; it’s a gateway to melodic inspiration. Beyond major and minor scales, delve into the diverse range of options – Dorian, Phrygian, Lydian, Mixolydian, and Locrian each offer distinct flavors. Use the ‘Scale’ button to cycle through these possibilities.
Experiment with different root notes within each scale. This allows you to transpose the scale to various keys, finding the perfect fit for your composition. Combine Scale mode with the Arpeggiator to create melodic sequences that inherently sound harmonious.
Consider using Scale mode as a learning tool. It visually and audibly reinforces scale patterns, aiding in improvisation and music theory comprehension. Explore the ‘Scale Lock’ function to constrain your playing to the selected scale, fostering creativity within defined boundaries.
Integration with Software & Hardware
The Keystep seamlessly connects to your favorite DAWs, synthesizers, and mobile devices, unlocking a world of creative possibilities for music production and performance.
DAW Integration (Ableton, Logic, etc.)
The Arturia Keystep excels as a MIDI controller within Digital Audio Workstations (DAWs) like Ableton Live, Logic Pro X, and many others. Upon connecting via USB, your DAW should automatically recognize the Keystep as a control surface.
Configuration within your DAW typically involves selecting the Keystep as a MIDI input device. You can then map the Keystep’s knobs, buttons, and sequencer to control various parameters within your DAW – instruments, effects, mixer levels, and more.
Many users find the Keystep’s arpeggiator and sequencer particularly useful for triggering clips or automating parameters in Ableton Live. Logic Pro X users can leverage the Keystep for expressive performance and detailed control over software instruments. Explore your DAW’s MIDI learn functionality to customize the Keystep’s integration to your specific workflow, maximizing its potential for creative music production.
Connecting to Synthesizers
The Arturia Keystep seamlessly integrates with a wide range of synthesizers, both modern and vintage, utilizing standard MIDI DIN connections. To connect, use a 5-pin MIDI cable, plugging one end into the Keystep’s MIDI OUT port and the other into your synthesizer’s MIDI IN port.
Ensure your synthesizer is set to a MIDI input channel that corresponds with the Keystep’s MIDI output channel (typically channel 1). Once connected, the Keystep can control your synthesizer’s sounds, triggering notes, modulating parameters via MIDI Control Change messages, and even synchronizing tempos.
For synthesizers with limited MIDI capabilities, the Keystep’s CV/Gate outputs offer an alternative connection method, enabling control over analog oscillators and filters. Experiment with different connection configurations to unlock the full expressive potential of your synthesizers.
Using with Mobile Devices (iOS/Android)
The Arturia Keystep offers excellent compatibility with iOS and Android mobile devices, expanding your musical possibilities on the go. Connecting requires the use of an appropriate adapter, such as Apple’s Lightning to USB Camera Adapter (for iOS) or a USB-C to USB adapter (for Android), as the Keystep utilizes a standard USB connection.

Once connected, your mobile device should recognize the Keystep as a MIDI input device. You can then use it to control a vast array of music apps, including synthesizers, drum machines, and DAWs. Powering the Keystep via the mobile device may require a powered USB hub for consistent performance.
Explore mobile music creation apps like Korg Gadget, Moog Model 15, and GarageBand to unlock the Keystep’s full potential in a portable setup. Remember to check app compatibility before connecting.
Troubleshooting and Maintenance
This section provides solutions for common issues, guidance on firmware updates, cleaning instructions, and details on performing a factory reset for optimal performance.
Common Issues and Solutions
Keystep Not Recognized: If your Keystep isn’t recognized by your computer, first ensure the USB cable is securely connected to both devices. Try a different USB port, and verify the Keystep is selected as an input device in your DAW’s preferences. A driver re-installation might also be necessary.
MIDI Data Not Transmitting: Check all MIDI cable connections if using MIDI DIN. Confirm the correct MIDI channel is selected on both the Keystep and your receiving device. Within the Keystep’s settings, ensure MIDI output is enabled.
Arpeggiator/Sequencer Not Syncing: Verify the sync settings on the Keystep match your DAW or external device’s tempo. Experiment with internal/external clock settings. Incorrect clock settings are a frequent cause of timing discrepancies.
Unexpected Behavior: A factory reset (refer to the dedicated section) can resolve many unexplained issues. Before resetting, document your custom settings for easy restoration if needed. Regularly check Arturia’s support website for known bugs and updated firmware.
Firmware Updates

Importance of Updates: Regularly updating your Keystep’s firmware ensures optimal performance, bug fixes, and access to new features. Arturia frequently releases updates to enhance functionality and compatibility;
Checking for Updates: Download the latest firmware from Arturia’s official website. The MIDI Control Center software is essential for managing firmware updates. Connect your Keystep via USB to your computer and launch the software.
Update Procedure: Follow the on-screen instructions within MIDI Control Center. Do not disconnect the Keystep during the update process, as this could cause permanent damage. The software will guide you through each step.
Post-Update Verification: After the update completes, restart your Keystep. Verify the new firmware version in the Keystep’s settings menu. Test all functions to ensure everything operates correctly. Back up your sequences before updating.

Cleaning and Care
Regular Cleaning: To maintain your Arturia Keystep’s pristine condition and ensure longevity, regular cleaning is crucial. Dust and debris can accumulate, potentially affecting key sensitivity and overall performance.
Recommended Materials: Use a soft, dry, lint-free cloth to wipe down the exterior surfaces. Avoid abrasive cleaners or solvents, as these can damage the finish. For stubborn marks, lightly dampen the cloth with water, ensuring it’s not dripping wet.
Key Cleaning: Gently clean the keys with a slightly damp cloth. Avoid getting moisture into the key mechanisms. Do not use alcohol-based cleaners on the keys.
Storage: When not in use, store your Keystep in a clean, dry environment, away from direct sunlight and extreme temperatures. A protective dust cover is recommended. Handle with care to prevent physical damage.
Factory Reset Instructions
Performing a Factory Reset: If you encounter unexpected behavior or wish to restore your Arturia Keystep to its original factory settings, a factory reset is the solution. This will erase all user-saved sequences, settings, and customizations.
Reset Procedure: Ensure the Keystep is powered on. Simultaneously press and hold the ‘SHIFT’ and ‘OCTAVE UP’ buttons. While holding these buttons, power cycle the Keystep – turn it off and then back on again. Continue holding the buttons until the display flashes and resets.
Confirmation: Once the reset is complete, the Keystep will display its initial startup screen. All parameters will be reverted to their default values.
Important Note: This process is irreversible. Back up any important sequences or settings before performing a factory reset, as they will be lost.